|
|
Post by osprey on Sept 11, 2007 13:59:36 GMT -5
I got sights!!!! ;D 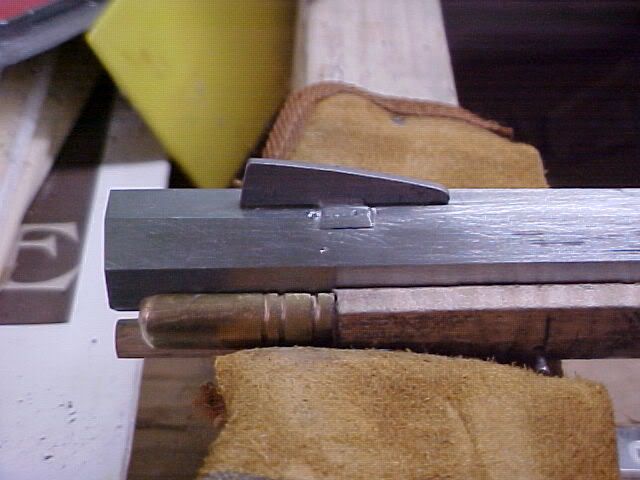 Last night and today I worked on drawfiling and sanding the barrel flats to get ready for sights and browning. Got the front site on first, need to do that to place the rear. Most guns have it turned opposite of mine, with the slant of the site forward, but since I'm building it for sika and deer hunting I wanted the slant rearward to catch as much light as possible for those first and last minute of shooting time opportunities. Then I layed the rear site on the barrel and, while looking down the sights, moved it until I could best focus on the site picture, making sure I didn't place it exactly at the balance point where my hand will fall when carrying it. Once where I wanted it I marked in pencil both the outside of the base and the top of the angles for the dovetail. 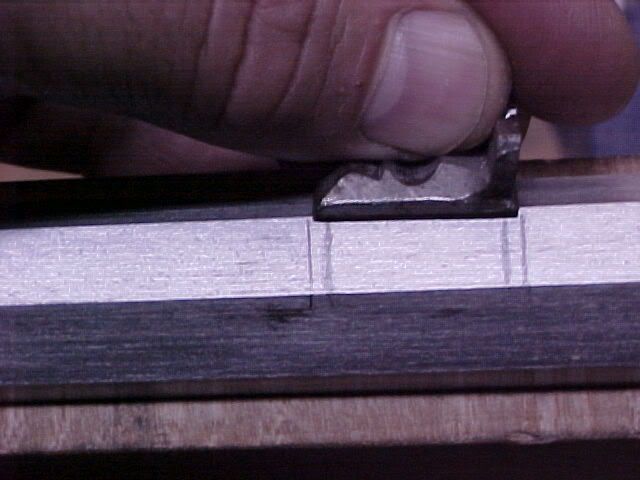 Then you take a big old nasty hacksaw to that pretty, shiny, $200 barrel.  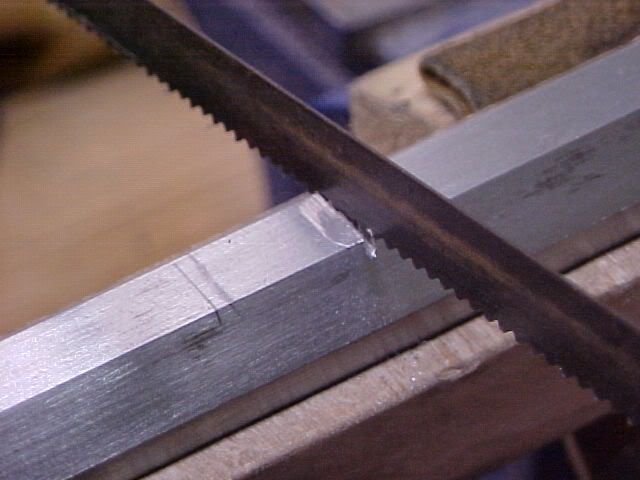 Cut down as deep as the teeth on the saw blade, making many cuts where you need to remove metal. Then file it flat as deep as it needs to be... 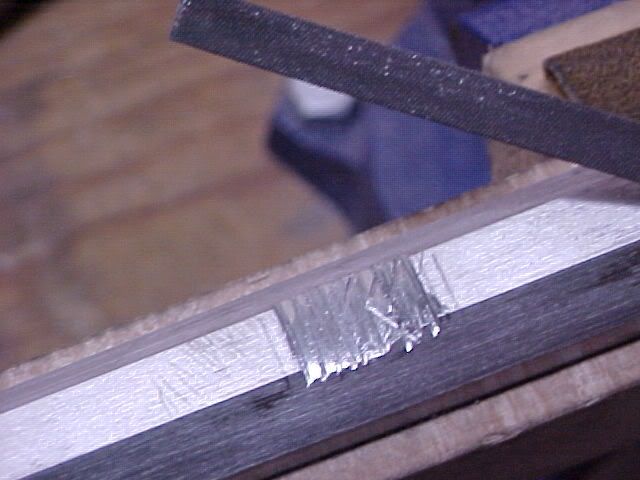 Once it's flat, level and almost as wide as the narrowest, top part of the dovetail on the site, you use the special 3 square safe file (a normal 3 sided file with one side ground smooth so it doesn't cut). Place the smooth side of the file down, so it doesn't cut any deeper into the barrel, and file out the angles for the dovetail base... 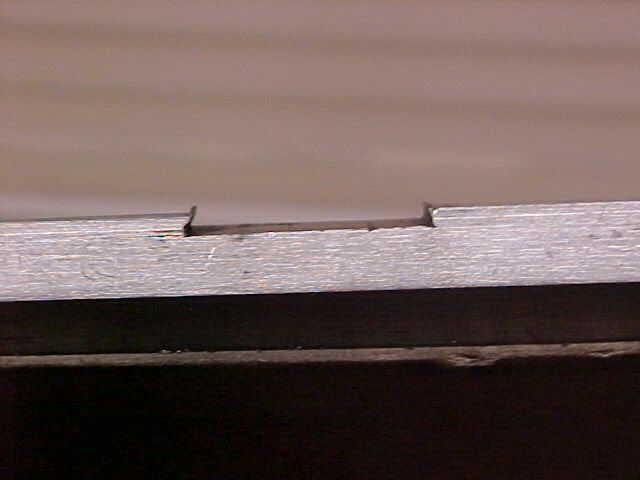 Then it's just a matter of filing off a bit at a time with the safe file until the site base just fits snug. Slide it in as far as it will go, tap the rest of the way in with a hammer and punch, then use the punch to peen the dovetails tight. Presto, now I can aim at stuff! 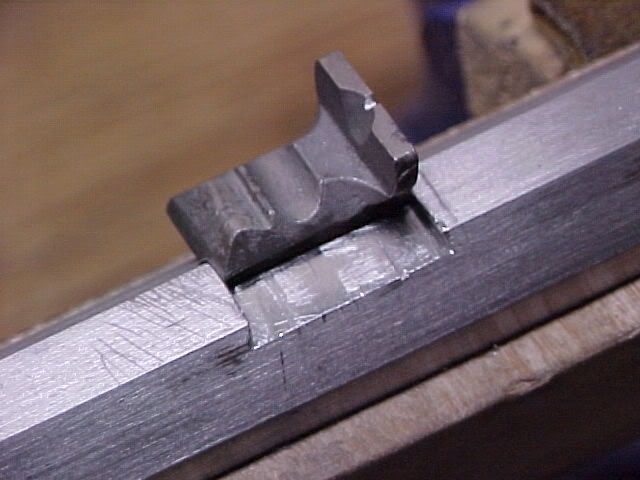 |
|
|
|
Post by reed on Sept 11, 2007 14:12:57 GMT -5
One of the best threads on this site!
|
|
|
|
Post by davep on Sept 11, 2007 16:20:24 GMT -5
Old silver dime front site?  |
|
|
|
Post by osprey on Sept 12, 2007 12:50:33 GMT -5
Old silver dime front site? Just a plain blade site, came with the kit. |
|
|
|
Post by davep on Sept 12, 2007 16:09:47 GMT -5
Old silver dime front site? Just a plain blade site, came with the kit. I know, but alot of the Old Timers like to use the dimes. |
|
|
|
Post by osprey on Sept 13, 2007 12:24:51 GMT -5
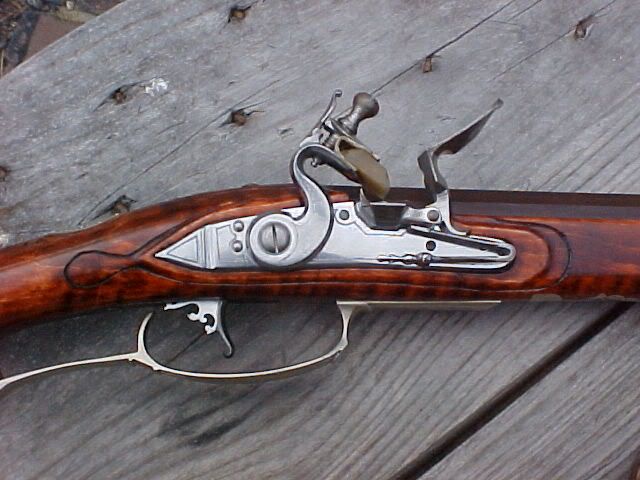
I had to listen to a half hour of crap from the fellas last night about how I put my front site on - they won't let up that it's on backwards!  Started more wood working last night over there, beginning with laying out and doing the first cuts on the molding line between the cheek and wrist... 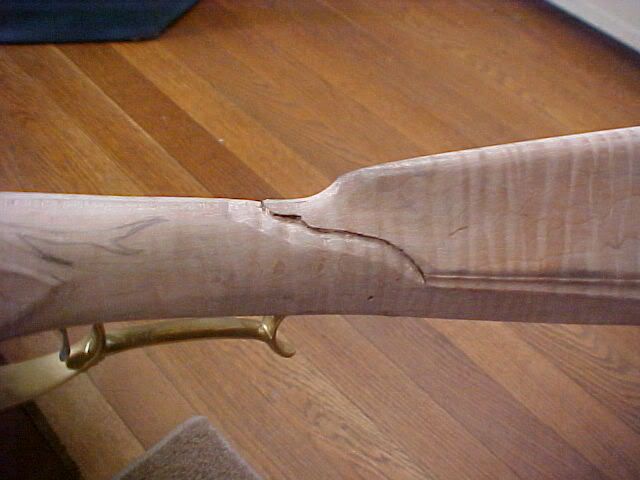 ...and then the major artwork - the sika stag on the rear of the stock! They were impressed with this one - at least they shut up about the front site for awhile! ;D Lots more to do on this, but here's a shot of the beginning of it... 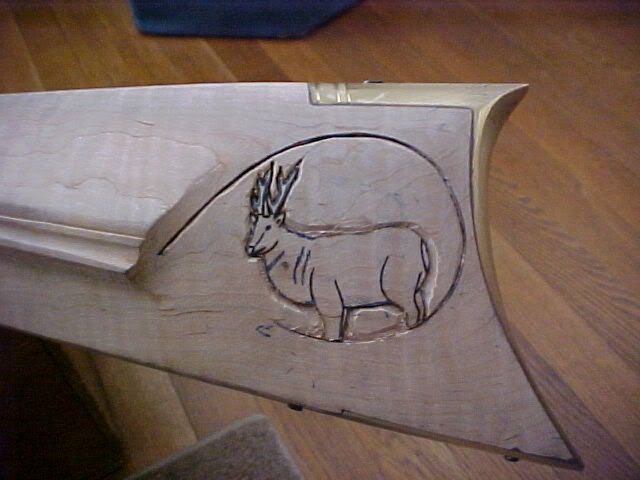 |
|
|
|
Post by osprey on Sept 20, 2007 14:56:45 GMT -5
Work continues... Most of the last week, between hunting and work, was spent on the back of the stock. Got the sika background cut away, the stag shaped and rounded, background grasses and phrag gouged in. A bit of sanding left around the antlers and this part will be done... 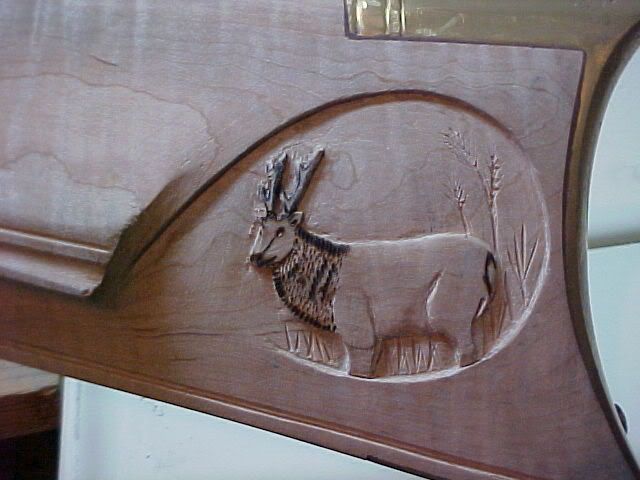 Last night we worked on the forestock. It's amazing how thin this part becomes. Look back at the site installation pics and you can see the stock is almost a 1/4" thick along the barrel on the rough blank. Now look at how thin it is, between 1/16" and 1/8", and I've still got to sand it down to a thin feathered edge along the barrel. My mentors tell me it's got to be almost breaking, that thin. 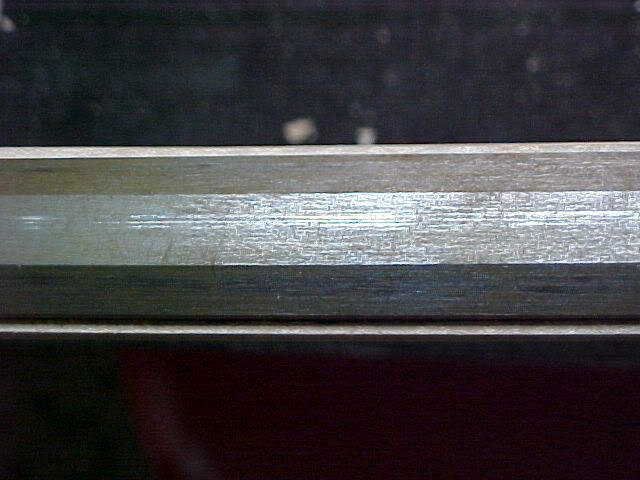 Also cut the ramrod molding last night, to match the trim edge you can see in the above sika pic on the back of the stock. Part of the artistic lines of the old guns, makes them flow together (the artsy way of saying it looks cool  ). Did it with a two edged checkering tool after cutting a slight guide line with a razor edge. 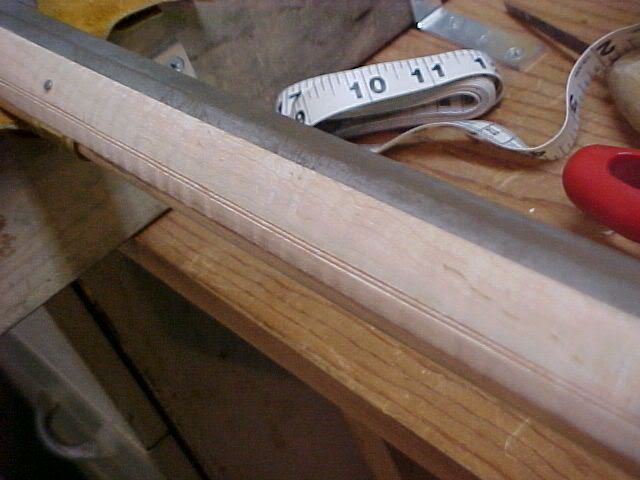 It's getting much farther along than the pics even show. I'm hoping to be done for October season! Gotta get some 3F black powder this weekend for the main charge (already have 4F for the pan) and I may shoot it soon. |
|
|
|
Post by THE DEER HUNTER on Sept 20, 2007 14:59:49 GMT -5
Quick ?...I see the brass is a bit scuffed up. How are you going to fix that? (Mine is on the gun I am working on & haven't found a way to get it back to its high gloss shine yet.)
|
|
|
|
Post by osprey on Sept 20, 2007 15:09:18 GMT -5
The brass has taken a few hits from sandpaper and files, but it's easy to fix. It all comes off still, so I'll spend a few hours taking off the brass parts and re-sand them down with 180, 400 grit, then 000 steel wool, then run them under a buffing wheel on a bench grinder. They'll shine like the sun.  But really I like the darker patina they get with exposure to air and elements, and since this will be a hunting gun I probably won't keep them polished after that. |
|
|
|
Post by davep on Sept 20, 2007 18:53:29 GMT -5
I've gotta say it again, Osprey, I'm DAMNED impressed.
The stag just seems to belong there.Did you use a burner on the mane?
Only things holding me back are lack of talent, and lack of patience!
But heck, I tossed together a kit 20 years ago, and hunted with it in the white for a few years, until I got around to finishing it.
Did make my own stain out of black walnut hulls, then finish with oil. It's gotten so dark over the last two decades, you can't hardly
see the grain. And that's not necessarily a bad thing!
Tried tobacco as stain once as well. Didn't do much.
Keep the pics coming.
|
|
|
|
Post by reed on Sept 20, 2007 20:49:13 GMT -5
I'm with you dave. There would be an article in the paper about an idiot that blew his face off with a home made rifle. I am passing this thread on to my dad because he can do this kind of stuff.
|
|
|
|
Post by osprey on Sept 21, 2007 12:11:02 GMT -5
Yes, used a wood burner on the mane, it should turn dark and black when the stains are applied, just like a real stag's.
Thanks for the compliments! I can't give enough credit to the guys that are helping me. The advice, instruction, help and use of tools is helping me build a far better gun than I could have on my own, even with books and videos as guides. I've heard it takes 6-10 guns built to get really good at this, with the help of the Choptank Muzzleloader gurus I feel like I should get there by the 2nd or 3rd gun. For a first build I'm immensely pleased so far with this one, even though there are a bunch of things I'll do differently, and hopefully better, next time.
|
|
|
|
Post by osprey on Sept 25, 2007 19:17:09 GMT -5
With the forestock now cut down it seems to be moving fast - or am I just hurrying now that I found out Assateague is having a primitive black powder hunt this year?!?!?! ;D Spent the past two afternoons working on it. Completed shaping the mid-stock/forearm to match the fore end, block sanded the barrel channel edges and smoothed them, block sanded the ramrod channel and then sanded (with sandpaper wrapped around a wood dowel) a concave molding between the ramrod channel and the trim line we cut in last week. Fixed the trigger, too, got the newly thickened sear pin back on the lock, filed to fit and now both triggers work correctly. Also went back and cut all the pins (that hold the ramrod thimbles, barrel, trigger guard, etc) to fit and filed a slight bevel on their ends so they go in smooth. Today cut out the trim around the lock panels. Like that piece on the top of the cheek comb, had to cut away and level the background, leaving the lock panels looking like they raise out of the wood... 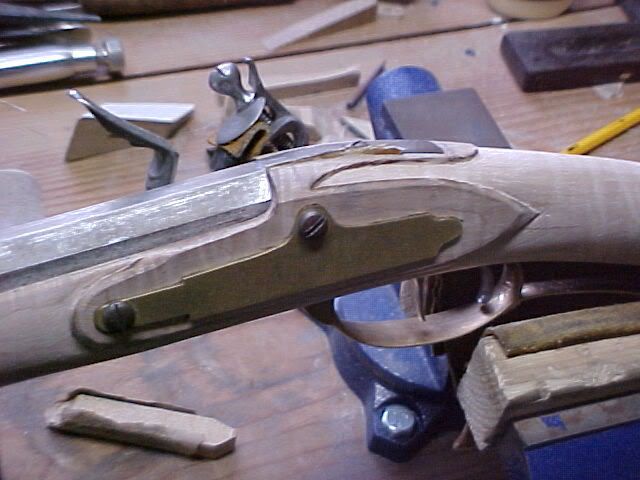 And I'll even show you a repair. First cuts I ever made on a gun were on the barrel tang inlet - before the guys that instruct me started helping out - and I cut too much wood away. Took a piece of wood trimming from the forestock and glued it in the gap, you can see it sticking up here... 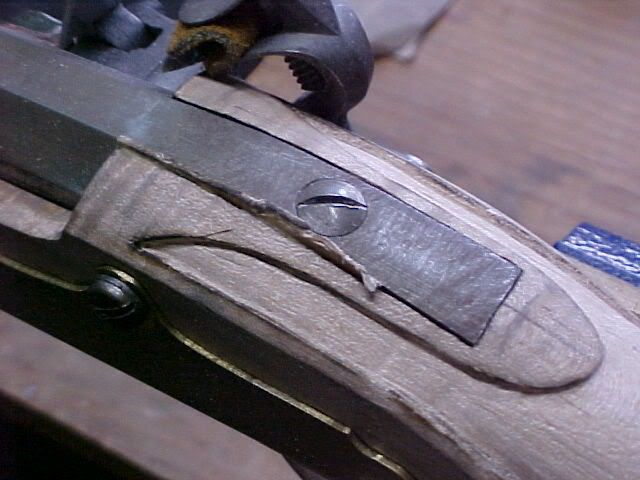 ...once the glue dries I'll cut it off and sand flush, barely be able to see it.  And I even started on the cheek piece design. Inlayed this silver half moon, it also gets wire inlay in a starburst pattern behind it. Sika by moonlight. ;D 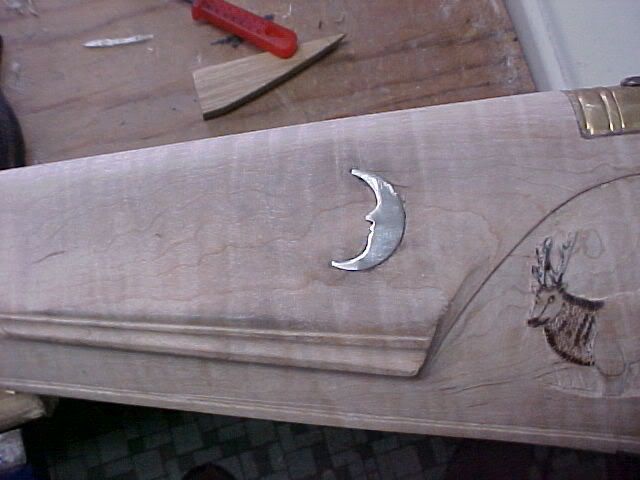 |
|
|
|
Post by osprey on Sept 26, 2007 13:45:16 GMT -5
Spent about 20-30 minutes just now cleaing up a few things before tonight's building sessions in St Micheals. Got the moon filed flush and the pattern drawn on for the wire inlay of the star burst... 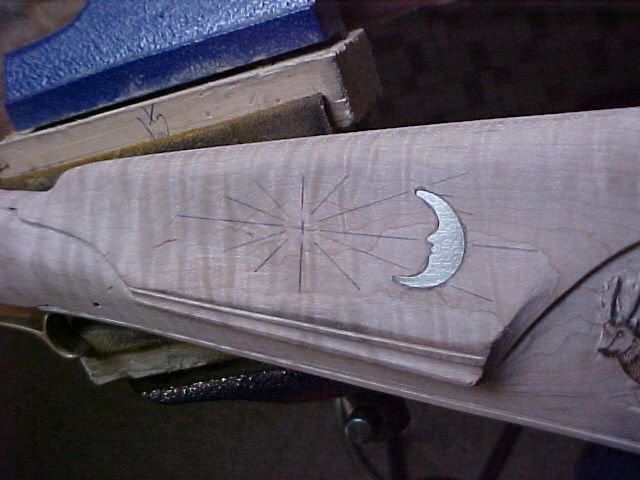 Also played around with the mid section where the hand grips the stock. Had this idea all along, only took about 15 minutes to draw it on and cut it out. Duhhhh, which way did he go?!?! 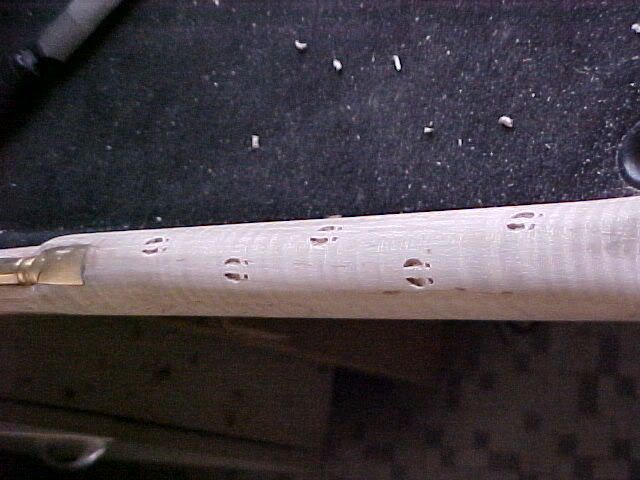 |
|
|
|
Post by osprey on Sept 27, 2007 11:52:25 GMT -5
Cleaned up a bunch of little things left to do on it last night, then started the wire inlay. Was first thinking silver inlay, but went with brass instead. Here's the result... 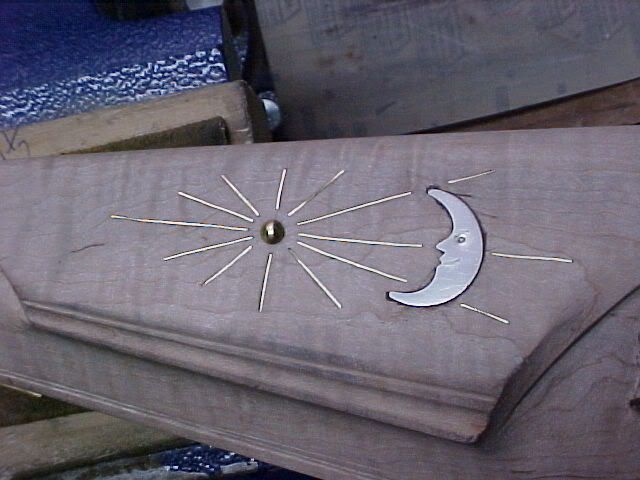 Now it's on to a LOT of sanding and resanding, then staining and oiling the wood, browning the barrel and lock. Within two weeks of being done at the very longest. And I'm going to shoot it this weekend and sight it in. ;D ;D ;D |
|


 ). Did it with a two edged checkering tool after cutting a slight guide line with a razor edge.
 But really I like the darker patina they get with exposure to air and elements, and since this will be a hunting gun I probably won't keep them polished after that.